
Today’s Problem
When Revving the engine, I am currently getting darkish smoke at higher revs – I this indicates soemthing is not burning properly or something (engine oil) is being burned that shouldn’t be. Current the options are:
- Incorrect carburetor set up
- Piston seals aren’t
- Head Gasket – no “mayo” in the rocker cover so it isn’t mixing with water at least
- Problems with the head itself
- Incorrect viscosity or modern oil making its way past seals?
- Something Else
To help diagnose I’m going to perform a compression test, this will help me get a better idea of the general health of the engine – I’m specifically looking for oil getting into the engine and valve-seat recession, which I will explain below.
How Will a Compression Test Help?
First the compression test is a diagnostic test – it will help me identify if I have certain types of problem, it won’t fix the fault. It might be worth reviewing at this point how an engine actually works. The basic cycle is often described as suck”, “squeeze”, “bang” “blow”. The inlet valve opens allowing air and fuel mix through the carbs into the cylinder , the piston draws down at this point creating a vacuum to suck the mix in. The inlet valve closes as the engine turns, and the piston is pushed upwards, squeezing / compressing the air-fuel mix. At the correct point in time (hopefully!!!) the spark plug fires – exploding the mix creating our “bang”, it is this explosion with pushes the piston down and provides the power for the engine. Then as the piston rises in the cylinder once more, the outlet (exhaust) valve opens to blow out the spent gases.
At each point the correct things must be satisfactorily sealed – The pistons must be sealed against the inside of the cylinder at all times or gases will leak past. As the bore is circular the piston head has a series of o-rings around it to achieve seal. The valves must also close properly against their seats at the correct points in the cycle or gas will rush past. These seats in particular need to be watched in older cars such a the MG as the engineers relied upon lead in the petrol to lubricate the process. If the engine has been run on unleaded pertol without a lead substitute the seats can wear and recess into the head and breaking the seal with the valve. The valve seats and the piston o-rings seal the moving parts, but additionally cylinder head must be sealed against the cylinder block by means of the head gasket.
From a compression test point of view – the “bang” part of the cycle – is the critical point – both the inlet and outlet valves are sealed, the piston is at the top of the cylinder with maximum compression of the air-fuel mix. By measuring maximum pressure (at the bang point) we can get some idea about the effectiveness of the seals, and with a bit of know-how we can get an idea about which seals are the problem. To do measure this we use a hi-gauge compression tester – a device which fits into the spark plug socket.
Performing the Compression Test
In practice performing the compression test is easy – remove all the spark plugs (so the engine turns more easily under the starter motor) screw in the tester to the cylinder you want to check and turn the engine. Repeat for each cylinder noting your results as you go, this is the dry test. Repeat again having squirted engine oil into each cylinder (the wet test) – the oil acts as a seal on the piston, so problems with the o-rings will result in a significant rise of compression between wet and dry tests for a given cylinder. First up draw up a grid, one column for each cylinder (1-4) and two rows (dry and wet):

For completness sake, this was done on the back of Private Eye magazine – the advert is for Theakston’s beer, or Kumquats, I’m not really sure which.
Getting Ready
You’ll need: The compression tester – as I said get hold of one with a 14mm thread for the MGB, there are quite a few on ebay and Amazon. Your spark plug spanner of choice, and oil can with engine oil in it. A bit of paper, masking tape and pen. You might also like to use a remote starting kit (the type that lets you turn the starter motor with a button while working in the engine bay) I just went back and forth between the engine and the cab and used the key like the pleb I am.
I used a Gunson compression tester – I had bought a Hilka one but it turned out to be unecessary – the spark plug itself might need an 21mm spanner, but the internal thread is 14mm – so the Gunson one worked fine (told you I’m not a mechanic). Just as well really as the Hilka kit I’d bought specially for the 21mm adaptor didn’t seam to seal properly and didn’t have instructions.
Step 1: Label your Spark Plugs
You are going to remove all the plugs- this breaks the seals on the cylinders you aren’t testing – fuel won’t be drawn in which prevents flooding, and the only cylinder with will provide any back-pressure to the starter motor will be the one you are testing, so the starter will turn more efficiently and you should get a more accurate result.
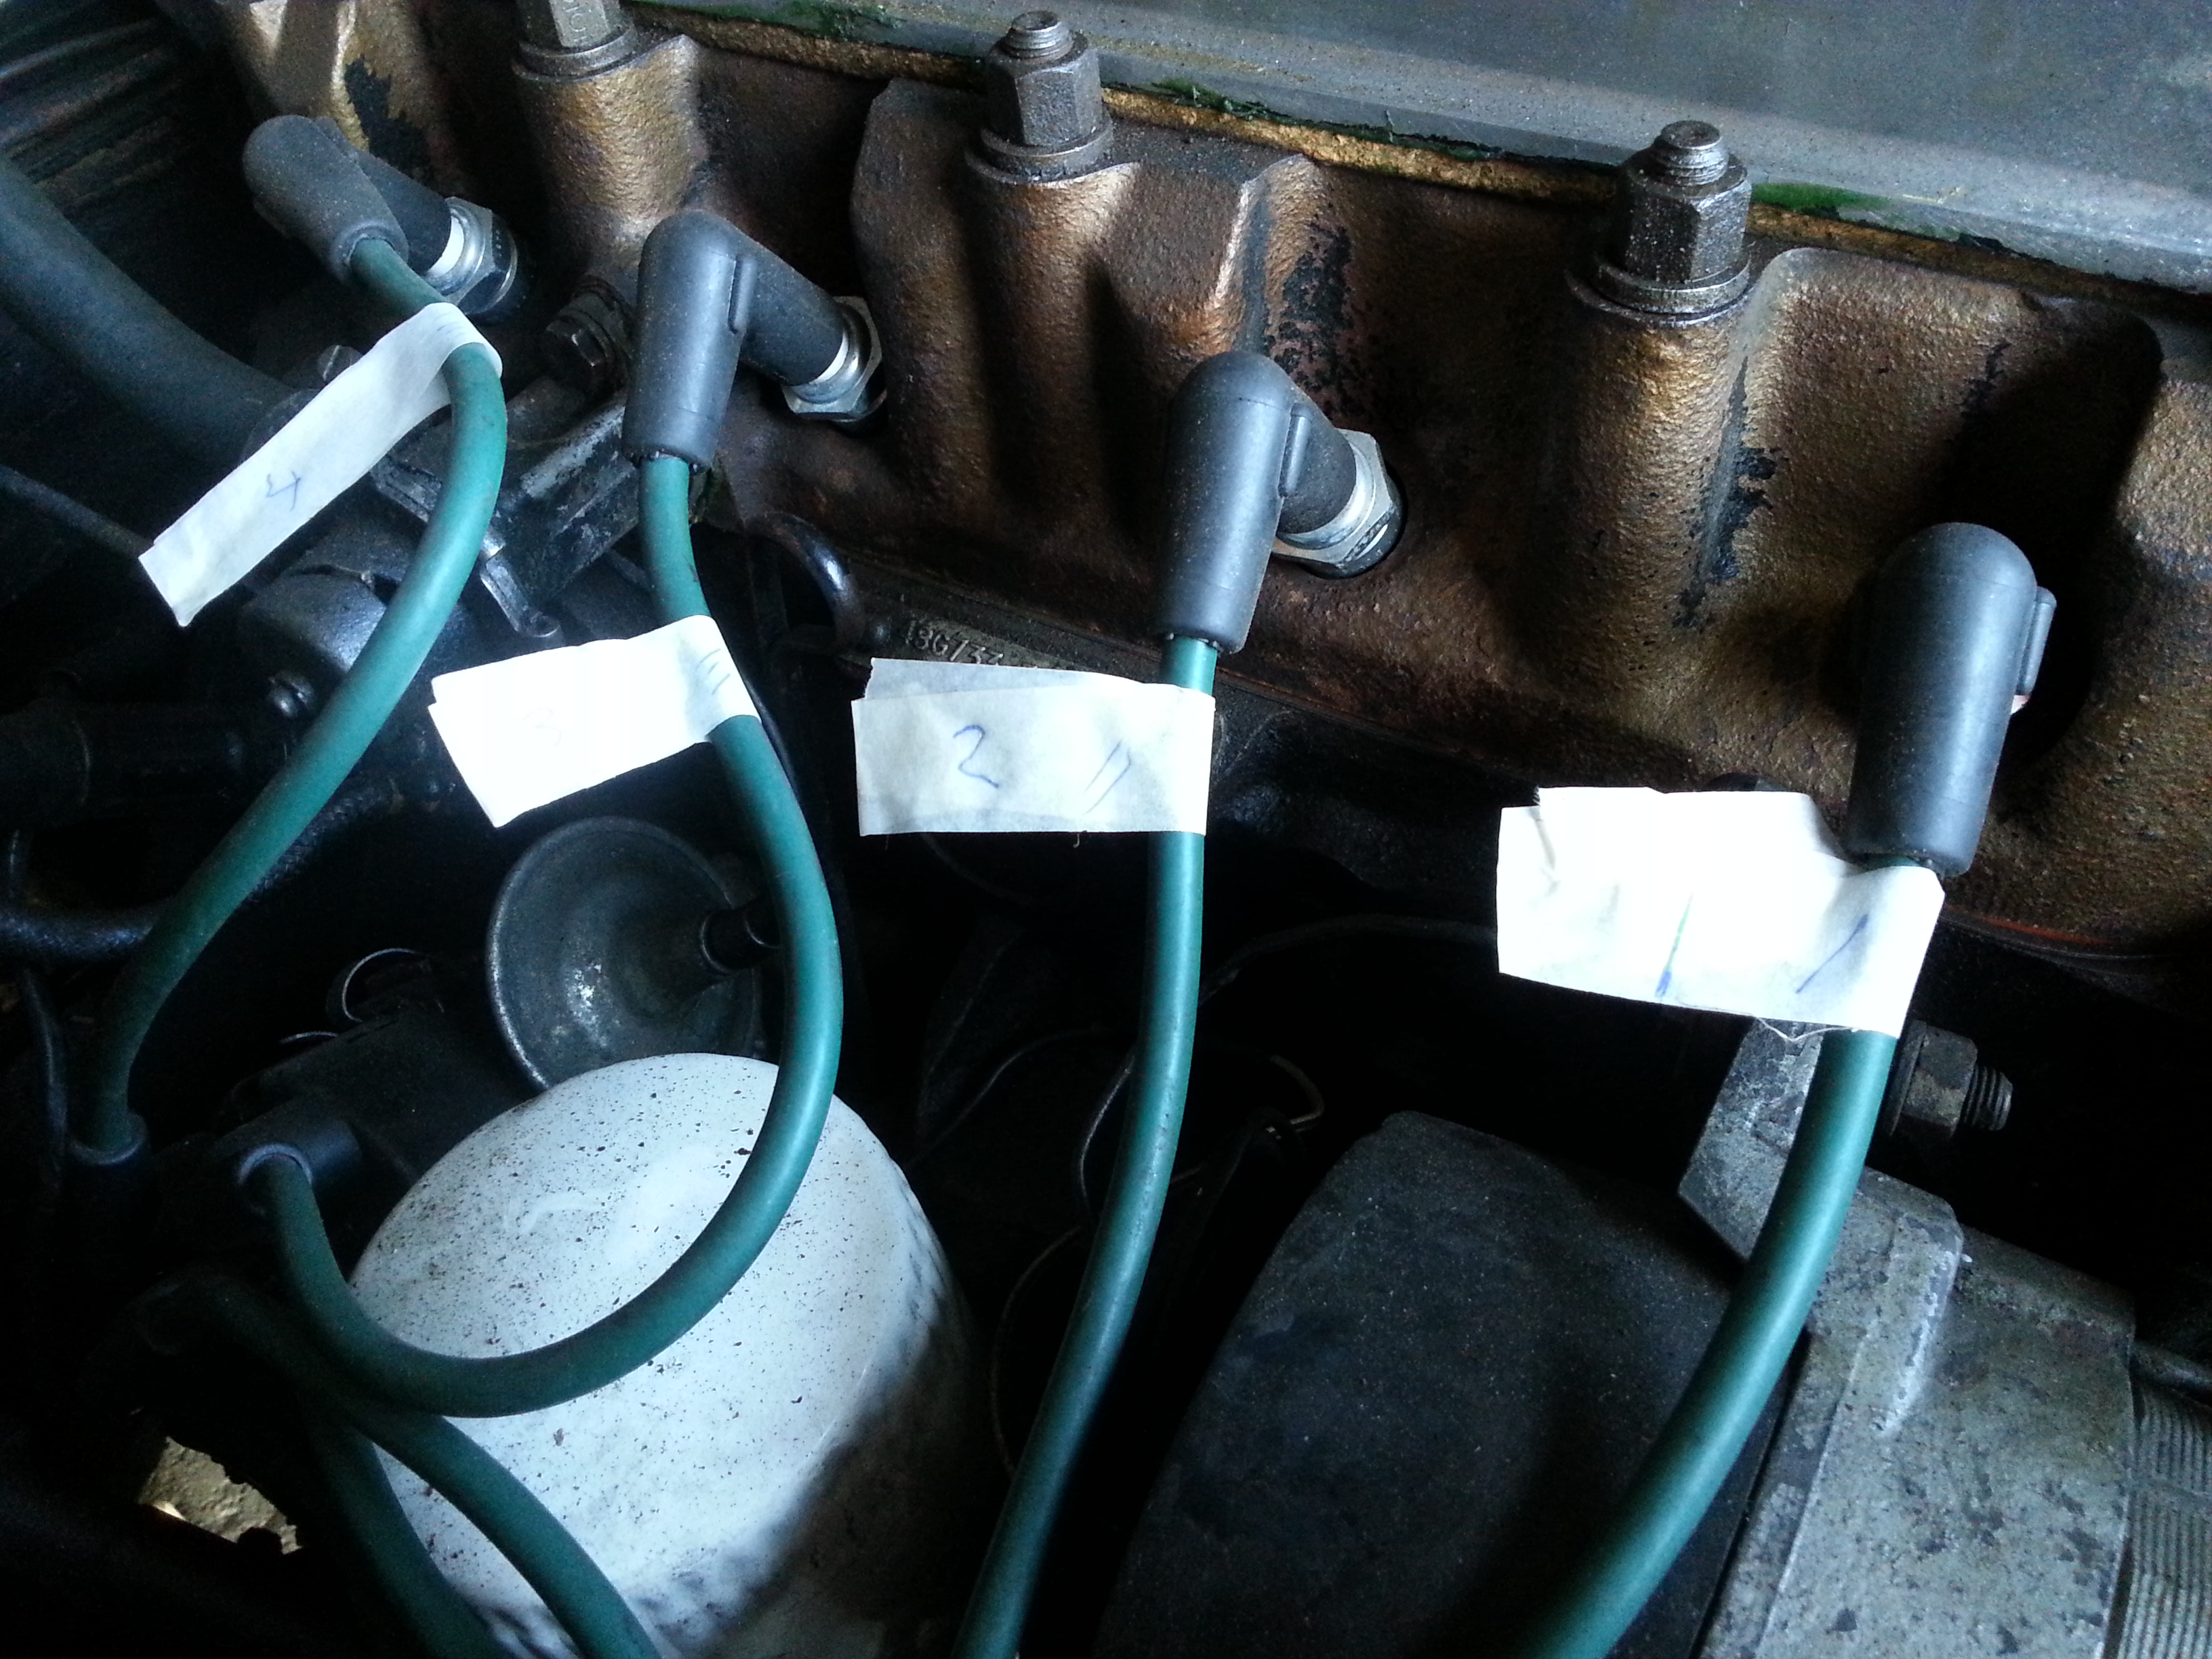
The labels were to allow me to re-attach the leads in the correct order, because I like to be able to start my engine. I’ve had problems with smudging and label tearage in the past – to I also make tally marks where the tape sticks on to the lead as a plan b.
Step 2 Remove all the Spark Plugs
Pretty self explanatory I suppose:
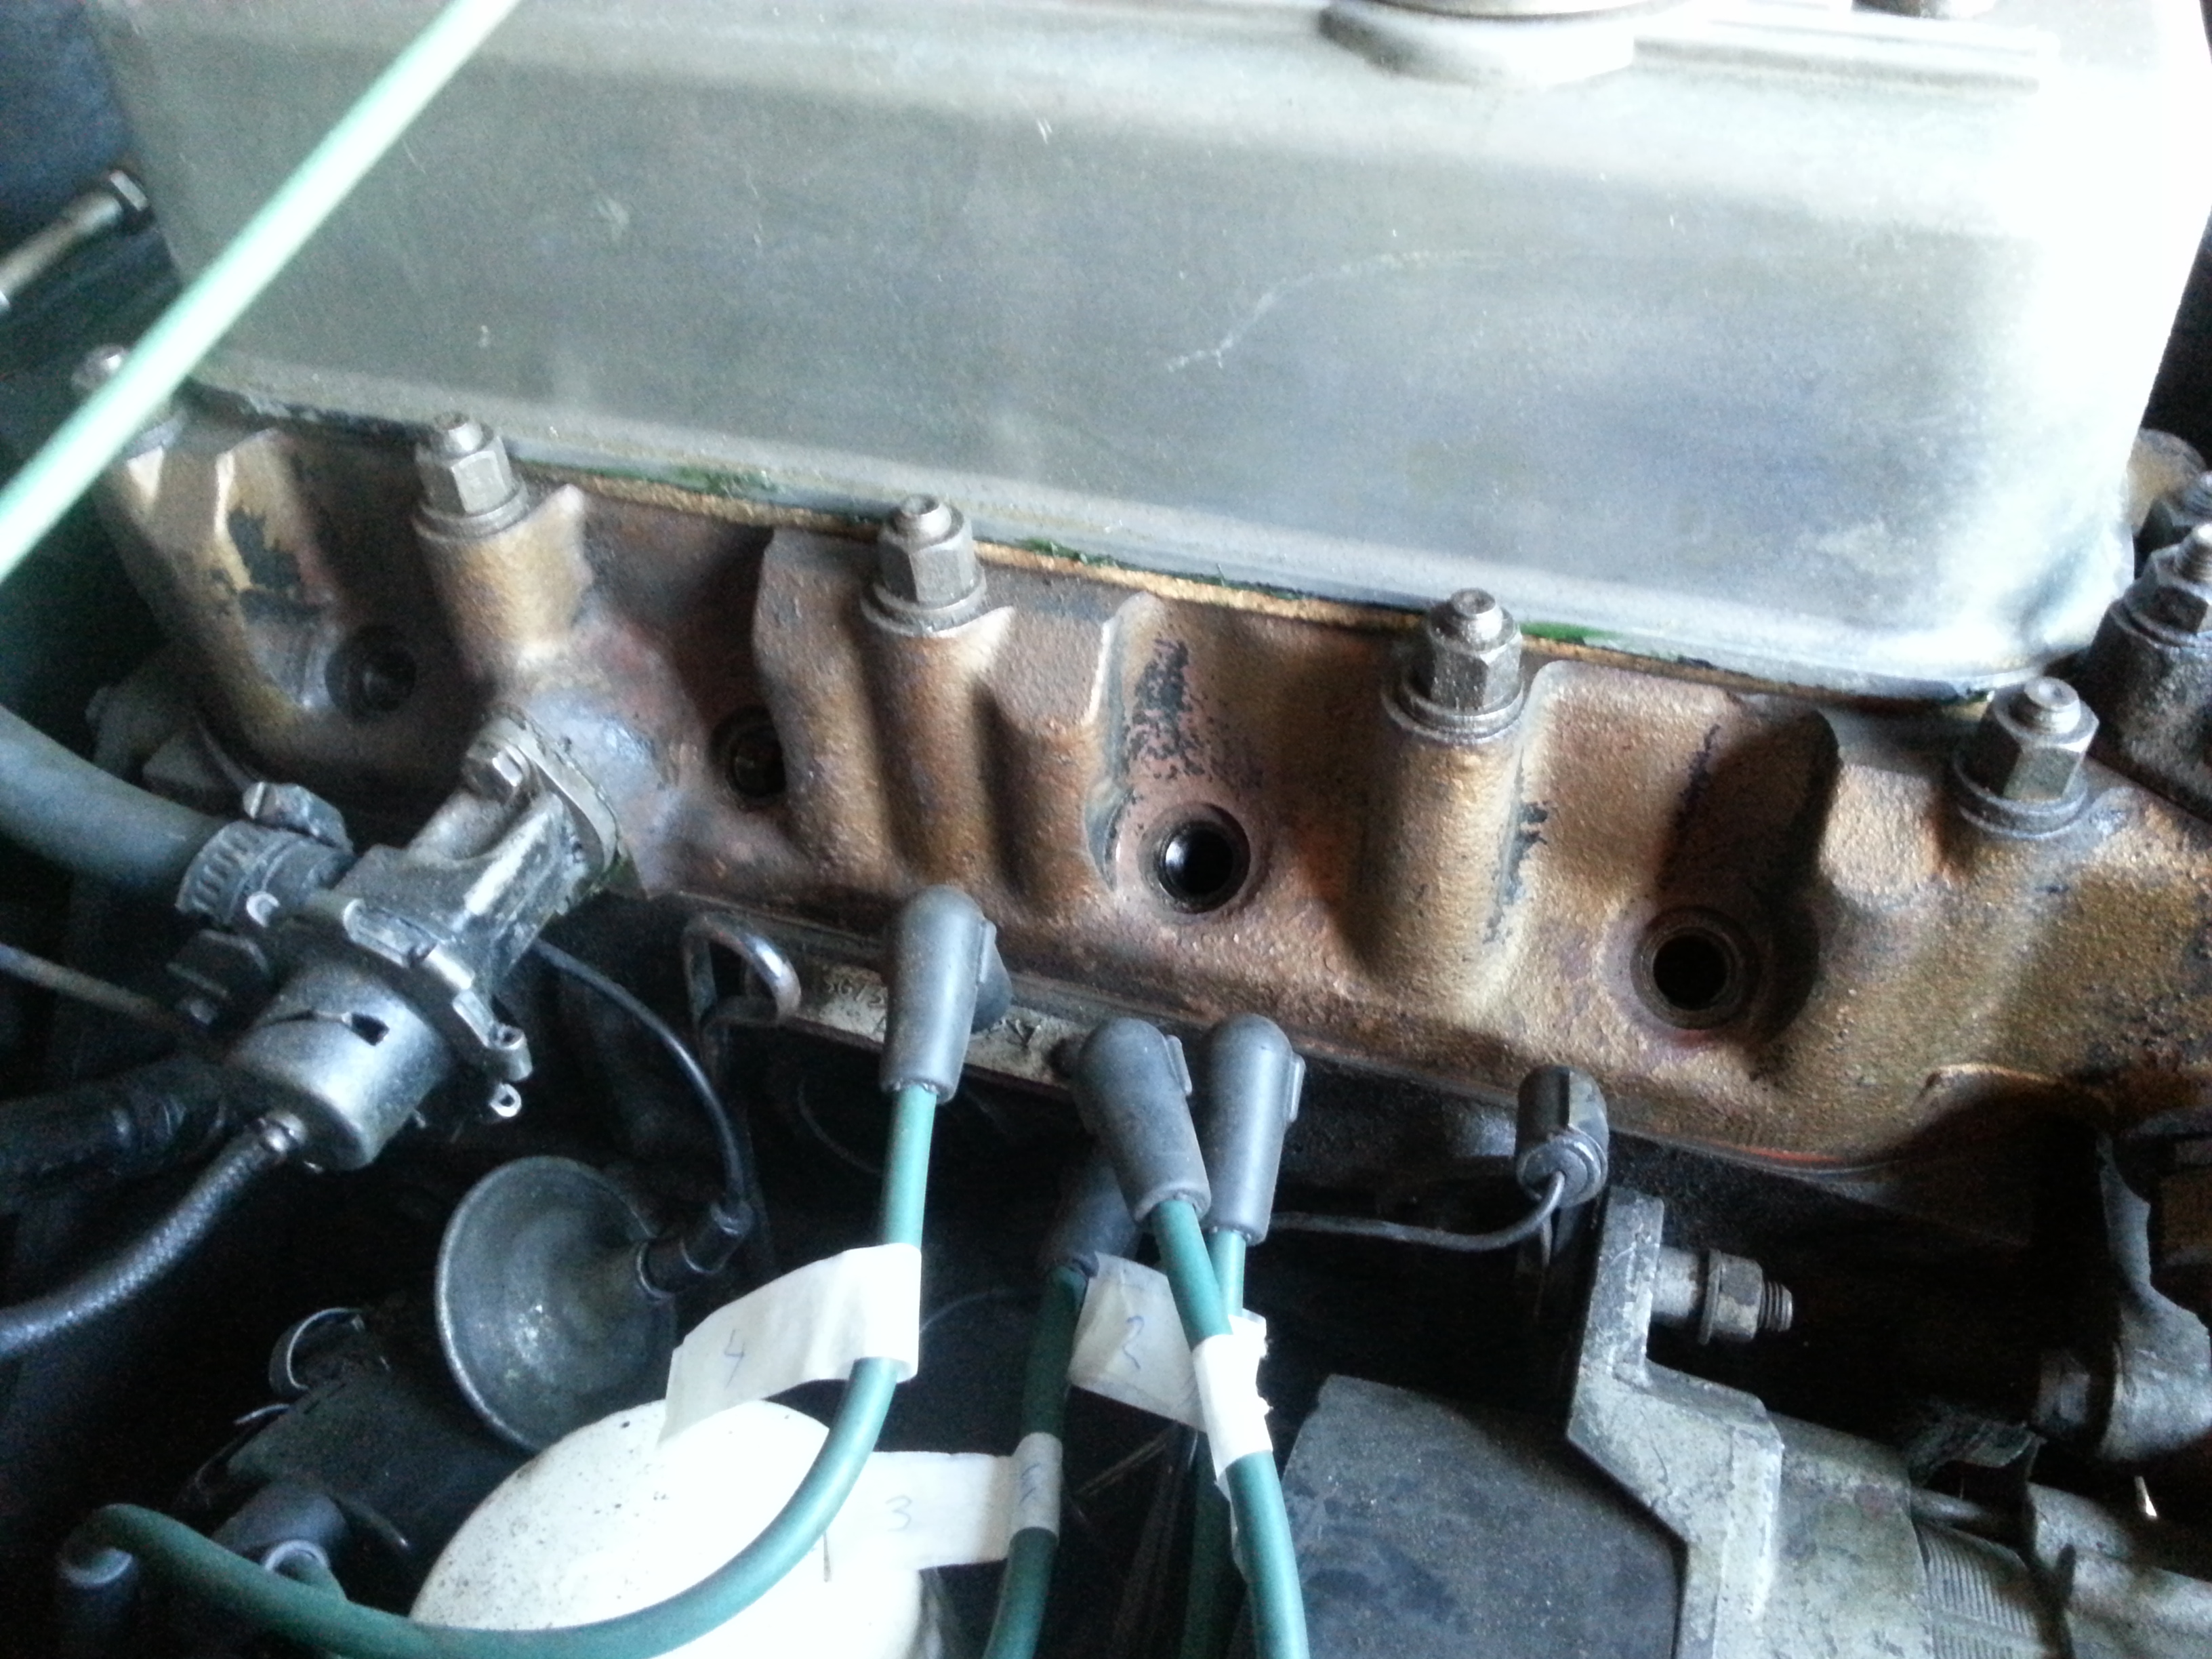
Note I’ve placed the spark plug leads against the cylinder block – if I’m going to get sparks I want them earthed somewhere innocuous and not through my hand.
Step 3 – Screw the compression tester in to the spark plug hole

First, be careful not to cross-thread, with the Gunson it took a bit of care, especially in the rearward cylinders, making a quareter turn anti-clockwise helps locate the thread before tightening. The Gunson instructions said to finger tighten the attachment. Make sure you zero the dial normally there is a button you press to release any pressure in the dial – in the Gunson case it is a button directly underneath the dial, to the side.
Step 4 Turn the Engine and note the result
Make sure you have zeroed the dial worth re-iterating :).Turn the engine – You’ll hear it sort of pulse as it turns, allow 5-10 pulses, then read the dial and make a note in the “dry” row for the cylinder you are testing. Repeat steps 3 & 4 for each cylinder, zeroing and noting for each.
Step 5 -the Wet Test
Wet testing is just the same as above, but before you start add a couple of squirts of engine oil via an oil can into the cylinder.

Step 6 Tidying up
Screw the spark plugs back in as normal and attach the leads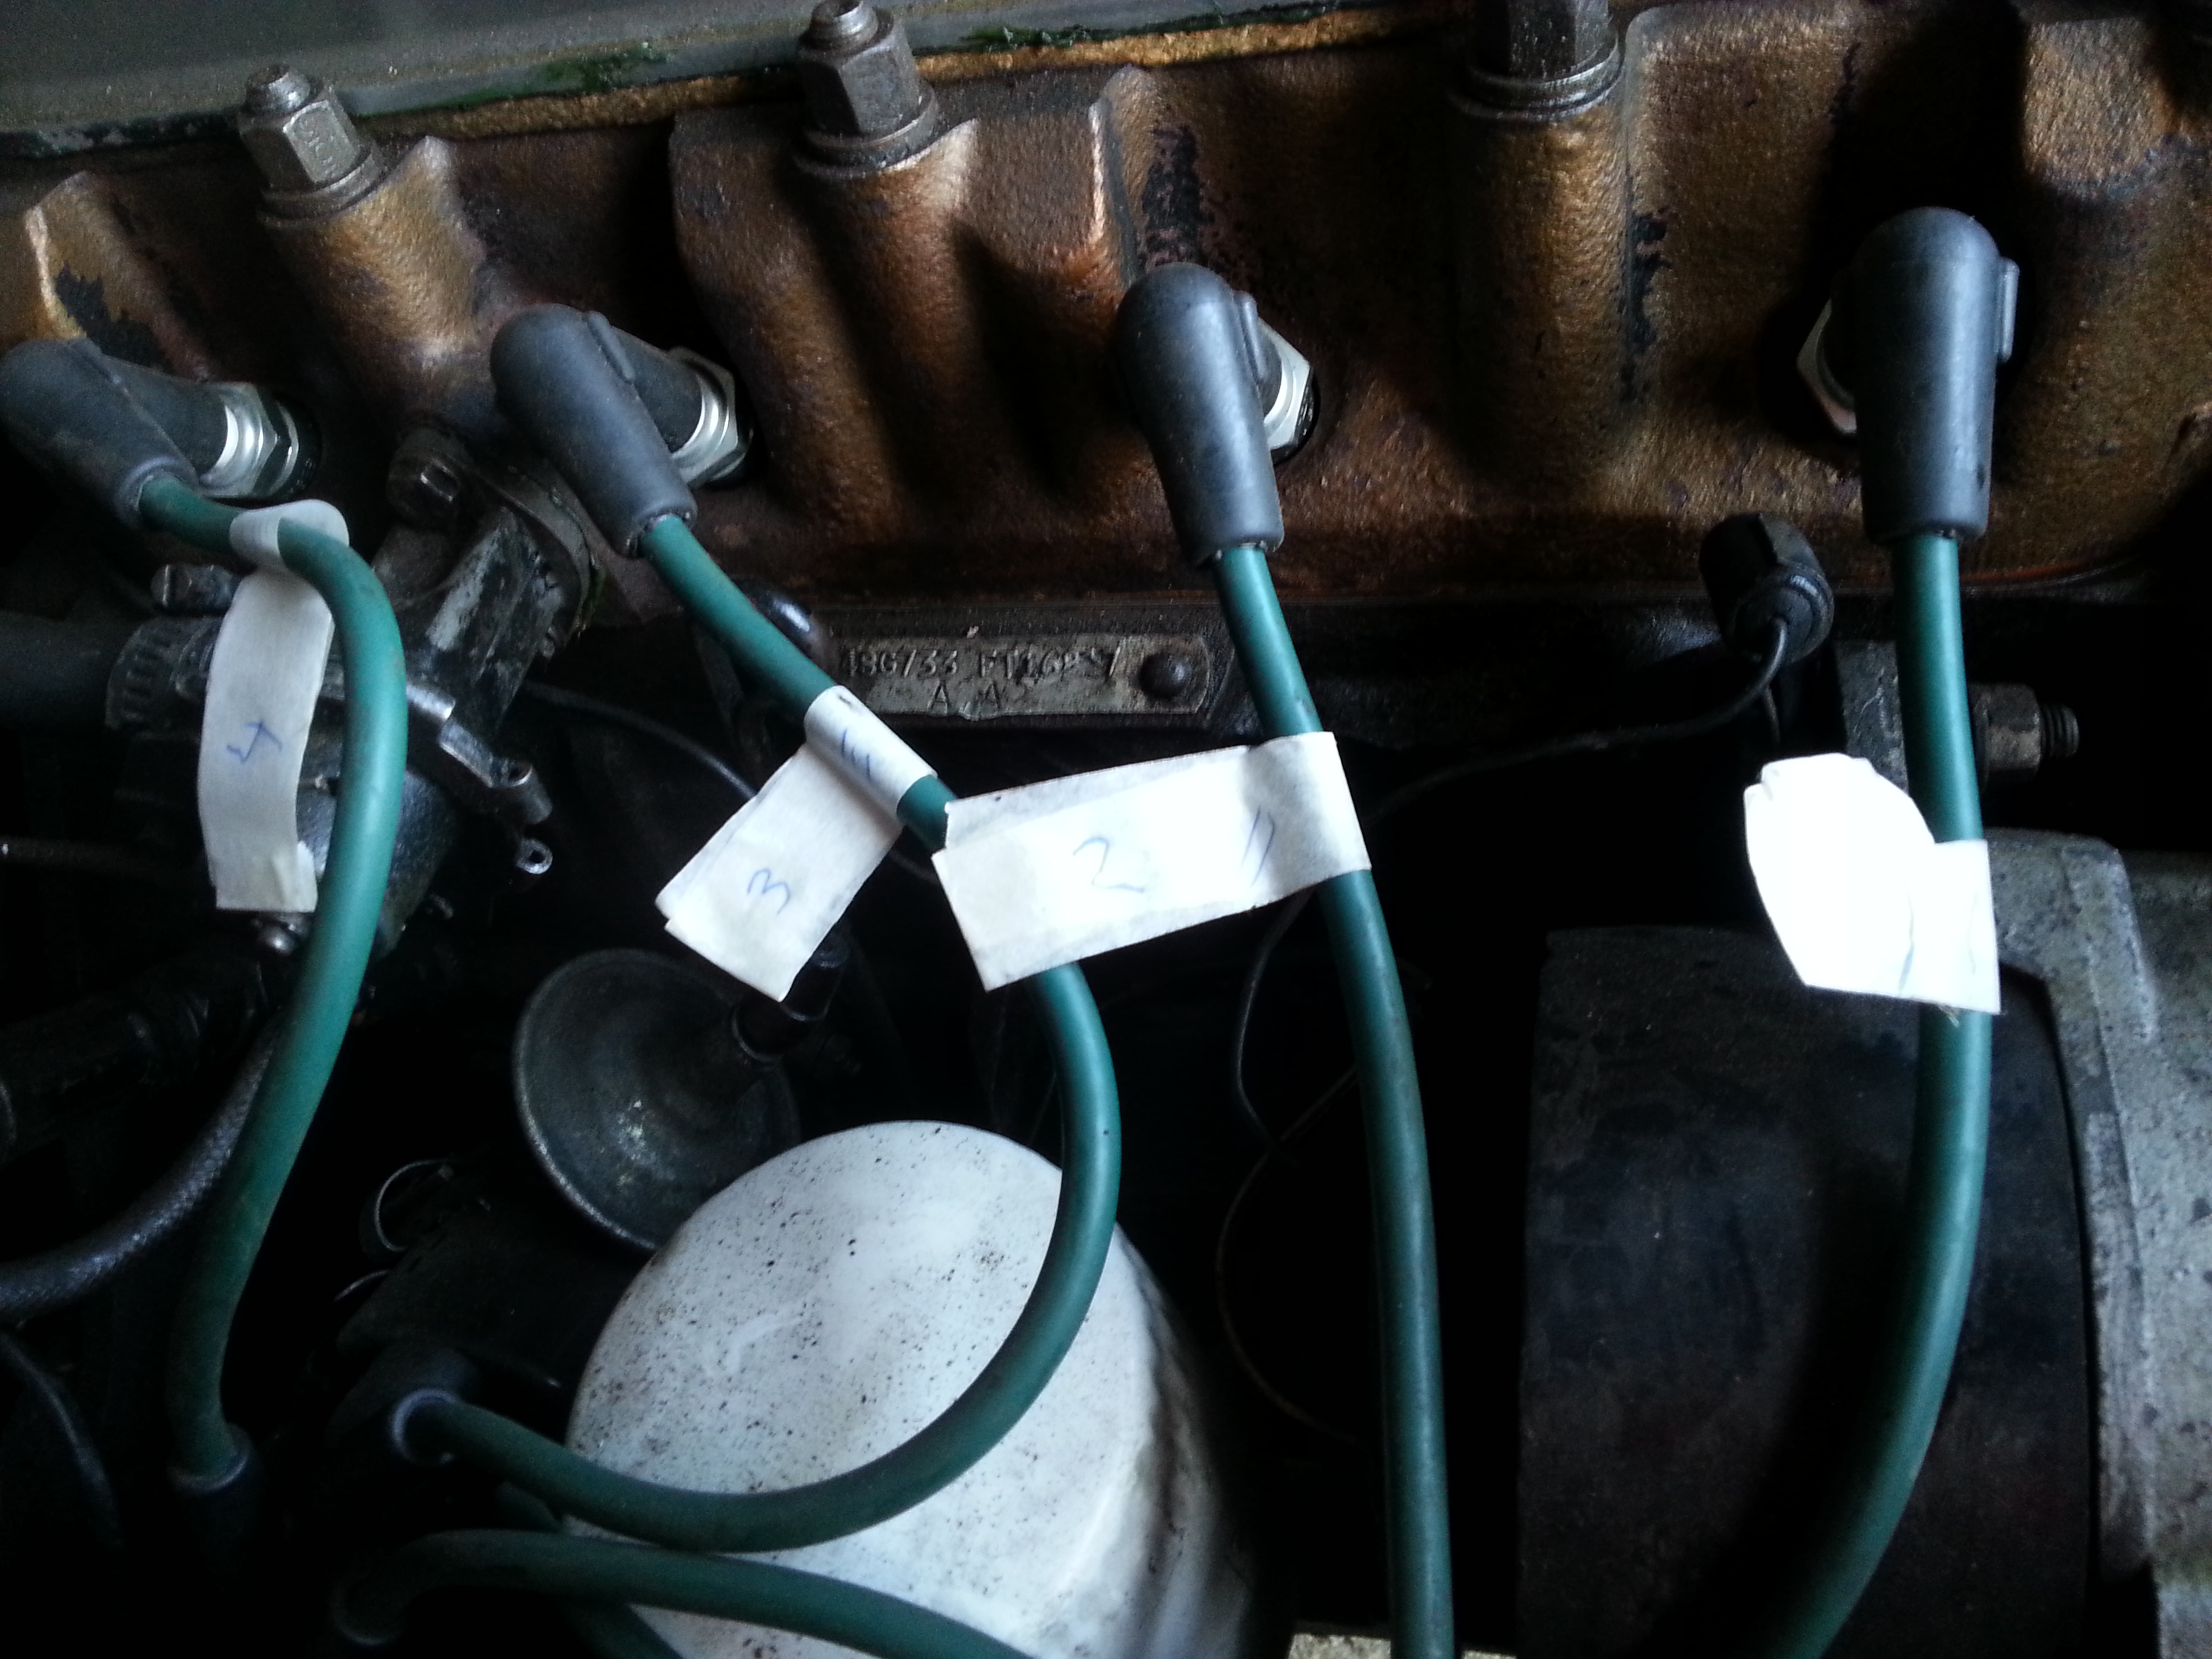
Interpreting Results
Interpreting the results of a comrpession test is the hard part. The bumpf on the back of the Gunson tester states that any variance of more than 15psi indicates a problem. For my engine (a 1974 1.8l High-compression “Gold” one) the expected pressure is 170 psi according to Haynes, YMMV – check online. If I get a compression of about 155psi on any cylinder that means there is a fault, also if any cylinders are more than 15psi different other cylinders (ie inconsistent compression across cylinders) then that also indicates a fault.
A single cylinder might show a drop – indicating that either it’s o-ring or valve seats might have problems, or the head gasket is damaged around that cylinder. The wet test lets me know whether the problem is with the o-rings – if a particular cylinder is low and the compression rises significantly with the oil in – the oil has sealed the cylinder indicating problematic o-rings. Note that the pressure will rise slightly with the oil as it takes space in the cylinder compressing the air more and the oil improves the efficiency of a working seal anyway.
No rise in compression indicates either the head gasket or the valve seats aren’t sealing. At this point you need to take the the cylinder head off – it is worth replacing the gasket as a matter of course, but you can test the valve by turning the cylinder head upside-down with the valve neatly in its seat. Dribble a little petrol onto the valve and leave it – if the petrol makes its way through the valve isn’t sealing properly and you have a job on your hands, and the MG it might mean valve-seat recession is happening and the best thing I can do is part-ex to an unleaded head.
Ed China, on Wheeler Dealers, said that sometimes two adjacent cylinders can show a drop in compression – this indicates that the head gasket is probably leaking one cylinder into another.
My results

First up – decide which units you want to use, it avoids scribbling, I failed to do this. For those who don’t or don’t want to read scrawl, the results in PSI were:
| Cyl 1 | Cyl 2 | Cyl 3 | Cyl 4 | |
|---|---|---|---|---|
| Dry | 160 | 170 | 170 | 160 |
| Wet | 170 | 180 | 180 | 170 |
My results don’t seem to be indicating any fault with the seals – all are withing 10 psi, two cylinders are even dead-on to the stated compression according to my Hayne’s manual, no mean feat in a 40 year old engine. Additionally, they are pretty consistent. Finally they did all go up on the wet test as expected, but not by much and again all consistently by the same amount per cylinder. This indicates there is probably nothing currently wrong with the seals at present. My next job will then to be to warm the engine up and check the air/fuel mix & timing. I know the engine has been run rich as the sparks were all carbonised, but this was to be expected as I’ve only periodically run it with the choke full, the car being laid up in the garage while I sort the brakes and clutch for the MOT, but that is another discussion.
